
In this blog post, I will tell you step-by-step everything you need to know to start a lifestyle blog from start to finish. Whether it be starting a mommy blog, a family blog, a baby blog or a travel blog, I will teach you everything you need to know (in simple steps) to start a lifestyle blog.
What are my credentials? I started blogging when I opened my own law firm. I built a website for my firm from a WordPress theme template, all on my own, and quickly grew it to over 150,000 users per month (with a little help from its blog traffic). A little while later, having taught myself all about blogging for a law firm, I decided to branch out to see if I could replicate my success in something a little less serious: lifestyle blogging. Daddy Lawn Games (the site you are on right now) is that experiment, and it’s already a big success, averaging month over month growth of 1000%.
Lifestyle Blog Budget
Before you get started, its important to not you will need a small cash investment to start a blog. You have to pay:
- Around $10 for a domain name
- Around $3-5 per month for a host
- Around $45 (one-time fee) for your theme
- WordPress itself is free!
Extra Funds? It is not needed, but it’s nice to have Ahrefs ($99 per month) right from the beginning. Sitekit Premium comes next once you have 1000 subscribers ($29 per month). Lastly, once you have about 50 posts, you will also want Securi ($199 per year) to protect your investment.
Simplified Steps for Starting a Lifestyle Blog:
- Pick a domain name
- Pick a WordPress blogger theme for your website
- Find a host to host your WordPress website
- Upload and edit your theme’s template to WordPress or use one of your theme’s demos
- Write your first blog post in WordPress
Make A Lifestyle Blog In 21 Easy Steps
Step 1. Niche
Pick a niche. You eventually want to appear like an “authority” on some topic. If you blog about two niches: video games and baby sleep, you might not be trusted for both. But if you regularly blog about just one niche, baby sleep, you will become an “authority” for baby sleep. Authority is important because it is a ranking factor on Google.
But don’t niche down too narrow. I made a mistake niching down too hard on this website. At the beginning of Daddy Lawn games, I mostly posted about “lawn games” as intended, but that was a little too boring and I ran out of topics. I decided I wanted to start blogging about all things family related. So now I’m in the family niche, not the “lawn games” niche, and I think Google doesn’t care one way or the other.
My Advice: In picking a niche, follow the Dot Dash method (they have different domains for very broad niches. Each niche is a wide topic like “homes” or “money”). For instance, The Spruce (a home blog) blogs about everything from restoring dining rooms chairs to reviewing vacuums while Lifewire (a tech blog) blogs about new movies on Netflix and how to save PDFs. This is a better strategy than having a blog that just blogs about dining room chairs or PDFs.
So pick a broad niche like homes, family, careers, money or beauty, etc. Don’t pick a narrow niche like teen parenting, or NYC condo living or credit cards or eye makeup. You will come to regret a narrow niche, trust me.
Step 2. Domain
Pick a “brand name” but make sure you can get the domain name with “.com”. I regret my law firm website’s TLD, “.ca” because now I lack trust signals when I try and attract US readers (which is the biggest market in the world). I wish I has chosen a “.com” or something modern and international like “.io” or “.law”.
Why would you pick a TLD like “.uk.co” for your domain when it sort of limits yourself to a British audience instead of a worldwide audience?
Pick a name you won’t regret later. I regret naming this blog Daddy Lawn Games. I wish I picked something a little less niche. I started out with the idea that I was just going to review lawn games sets on Amazon (i.e. posts like this: Best Ladder Ball Sets), but then I decided to switch to everything related to “outdoors and the family”, and then later I decided to niche up again to “everything about families”. I now wish my name was more generic. But a fresh domain will hurt my SEO, so I can’t switch.
It is a myth that you have to niche down super narrow to succeed on Google. However, it is true that Google prefers that you stick to a broad niche. I’ve ranked blog posts way outside my niche my lawn games mini niche a bunch of times. When I decided to branch out from “lawn games” blogs to blogs about all things family, the very first thing I did was rank a post about baptism gifts way better than any of my posts about lawns games on a website which was supposed to be about “lawn games”! This was a pleasant surprise and nice lesson for me.
Any name will do for your lifestyle blog. Your domain name won’t affect your posts’ SEO. You could even use a made-up name like, “Thekaxam.com” or a quirky name like “sunnygreenapple.com.” Why not, right? Dot Dash made a million-dollar blog for homes called, “Thespruce.com”.
Don’t use your last name. It will be hard to sell one day and it may be difficult to scale up.
Buy your blog’s domain name from Bluehost, not Godaddy because it will be easier for when you host your domain name (as I discuss below). If you buy a domain name from somewhere other than your host, you will have to transfer it, which is a hassle and a challenge for a new blogger. Don’t fret if you have to spend literally 2 extra dollars because your host choice sells domain names for $10 while Godaddy sells them for $8.

Step 3. Host
Pick a host for your domain name. Do not pick Godaddy as a host. It’s slow, the admin area is challenging, and it’s too expensive. Famed blogger Pay Flynn recommends (and I agree) to go with Bluehost. Bluehost is simply the best host for starting a blog. It’s cheap (the starter plan is $2.95 per month) and you get a free SSL certificate (which is a ranking factor for Google). You can scale up to a better plan at Bluehost as your traffic increases. Pay Flynn says this about Bluehost:
Bluehost is a proven powerhouse in the website hosting industry. They offer exceptional customer service.
You can get your domain, host and email all from Bluehost, so there is no worry about technical stuff and transferring data between service providers.
After your blog gains some traction, you can switch to a better host. But, honestly, Bluehost is more than fine for brand new blogs. It is cheap and cheerful, while better hosts are expensive (i.e. $1000+ USD per year for the basic package).
Step 4. WordPress
Through your host’s admin dashboard, set up WordPress on your site. It’s easy to install WordPress on Bluehost. Just follow this guide.
WordPress is the software you will be using to power your blog. 99% of bloggers recommend WordPress over something else like Squarespace or Wix.
WordPress is the best CMS for bloggers, period. A CMS is the bones and code of your website. WordPress is the most popular CMS in the world. With WordPress, and only with WordPress, there are thousands of plugins and themes that make designing and building your blog easy. Need an opt-in box? There’s a plugin for that. Need a map? There’s a plugin for that. Need a pop-up? There’s a plugin for that. Need an e-commerce platform? There’s a plugin for that. You don’t need to code. WordPress sort of builds your site for you (and the posts and pages for you too).
Once your WordPress is up and running on your host, it is super easy to post new blog posts. It’s as easy as making a new post on Facebook or Twitter.
Important Tip: By default, WordPress makes your “permalinks” of new posts the post ID number (i.e. website.com/post01). Change this. You want your permalinks to be the title of your post (website.com/greatseo), not some random number. To change the permalink structure on your WordPress website, go to the dashboard, find the left side menu, and click “Settings” and choose “Permalinks.” Then click the button to change your permalinks to “Post name”. Do this now because it’s very hard to change the permalink structure of your website after you have a lot of posts.
Step 5. Theme
Find a bloging-style theme on ThemeForest to copy the design and code for your WordPress blog site. You can use a theme template to basically copy demo sites created by the theme you chose. You don’t have to know any programming. All you have to do is follow the theme’s instructions on uploading its demo theme. Then, once the theme is installed, you can go into the theme editor in the WordPress dashboard to edit or change the text or pictures.
In short, a theme is basically a pre-built website, and it includes all the tools you need to edit and add new features.

I recommend Generate Press for your theme. That’s the theme I am using on this website. You can see their demo content you can use on your website here. I used X Pro theme on my law firm website. I recommend that one too. I am making other websites with Aveda and Newspaper theme, and so far those ones have been good too. There are lots of choices, so browse them all for a demo site you want to copy.

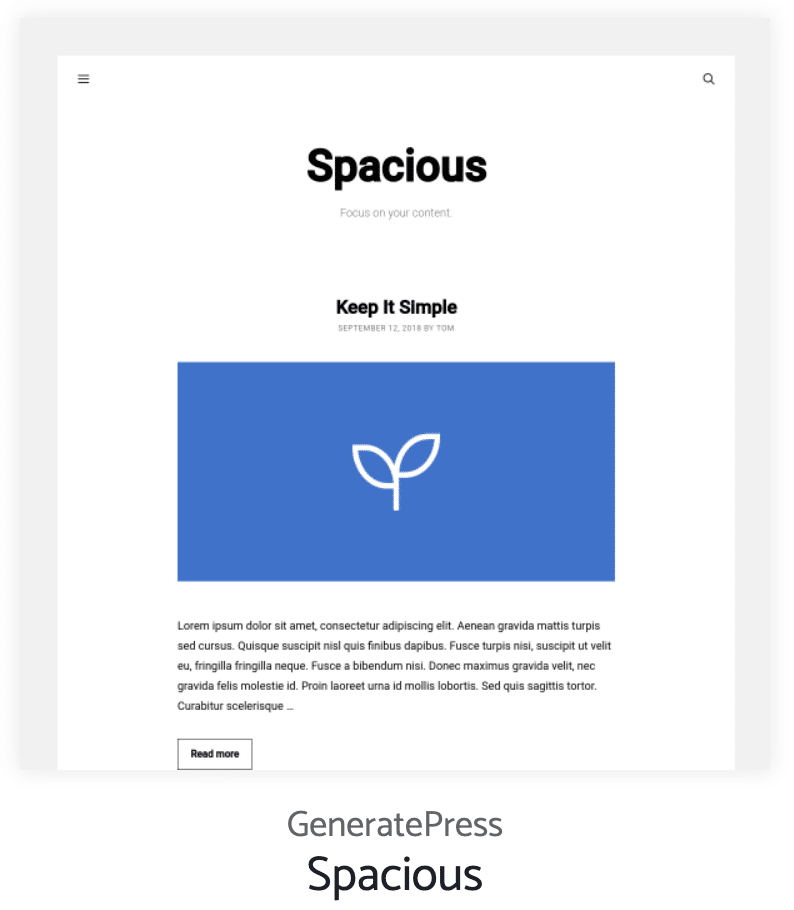
Make sure to choose a blog demo, not a business website demo. Your website is going to be a lifestyle blog, not a law firm, so just have a simple home page showing your latest posts and that’s it. This way it will be easier to edit the theme once you have uploaded it to WordPress. Generate Press has various blog-specific demos you can use.
Alternatively, you can just use the WordPress default theme for this year (they make a new every year). It looks great, its easy to start, and many successful blogs have launched and thrived with it. Check out this example of this bare-bones, minimal code blog using the Twenty-One theme from WordPress.
Step 6. Homepage
Edit your home page in your theme’s editor in WordPress in any way you like. Don’t spend days editing it though. You can do that later once your site really takes off. Just use the demo content and make a few text changes.
Generally, you can use a page builder app called Elementor to edit your theme’s homepage (and everything else). Elementor is the most popular WordPress page builder and it is included in most themes or you can just download it as a plugin for free. Elementor comes packed with tons of free page templates you can just copy or you can buy premium Elementor templates from third parties to copy.
Next, using a page builder like Elementor, add an About Us page, a Contact Us page, a Privacy Policy page and a Terms and Conditions page. Your demo should already have a template available to copy for the About Us and Contact Us page or you can find popular blogs online and see what they did and try and make something similar. For your Privacy Policy page and your Terms and Conditions page, you don’t need a lawyer. You can just copy a template from TermsFeed.
All the big themes like the ones I mentioned above have tons of documentation on you can edit your site/pages.
These four pages I mentioned above are trust signals for Google and for your readers. They are the only pages you need on a blog website to start except your Posts feed page. See above on my top menu as an example: all I have are a link to my blog (i.e. the Posts feed, which WordPress sets up for you automatically), About Me and Contract Me. The Terms and Conditions and Privacy Policy pages are linked in my footer.
With WordPress, “Pages” are different than “Posts”: “Pages” are landing pages like your home page and “Contact Us”. “Posts” on the other hand are the blog articles you will be making every week. You will probably never make another Page for a while after you finish setting up your About Us and Contact Us pages. But you will be making a lot of Posts!
For Posts, you don’t need to use a page builder like Elementor. You just use the native WordPress post editor called “Gutenberg”. That’s I how built this article you are reading right now.

Step 7. SSL
Set up a few things inside your website through your host to make it more powerful.
- First, set up your SSL with your host (just google your hostname and “set up SSL”)
- Second, set up an email account with your host. You want an email address with the domain name in it (just google your hostname and “set up email”). Add the new email address to your Contact Us page.
- Bluehost takes care of both SSL and email. But you do have to set it up.
Step 8. Analytics
Make a Google Search Console Account and a Google Analytics account. Google Search Console shows you how your posts are doing on Google and Google Analytics shows you how much traffic your website is getting.

Step 9. Plugins
Next, download a few WordPress plugins from inside the WordPress dashboard. I recommend you download these plugins to start (the basic plans are free):
- Yoast helps you write better Posts
- Securi is for website security (hacks happen a lot from bots who seek out vulnerable newby websites)
- MonsterInsights connects Google Analytics to your WordPress dashboard
Don’t download too many Plugins. They can slow down or break your site (even the good ones). And don’t download any abandoned or disreputable plugins as they are extremely vulnerable to malware hacks.
Step 10. Newsletter
Start your newsletter campaign today. Every blogger I have spoken to wishes they started their newsletter on day 1. You want to start collecting email addresses as soon as you can so you grow your newsletter list quickly.
You will need an email marketing platform and I recommend ConvertKit. It is probably the most popular one for WordPress bloggers. Sign up for ConvertKit on their website and then download their WordPress plugin to get started. Then add a few ConvertKit signup widgets on your website so it shows up on each Post and on your Contact Us page. Don’t worry about sending a newsletter just yet. Wait till you get a hundred subscribers (which will take a year or so). Then you can email-blast your subscribers with all your latest posts with a cool pre-formatted email template to drive traffic.

Step 11. Socials
Make a Facebook and a Pinterest account for your blog. Don’t worry about Instagram and Twitter. You don’t have enough time to post on all four big social networks, so only focus on Facebook and Pinterest. Facebook shows authority once you get a few hundreds likes and Pinterest drives social traffic.
Every time you make a new post, make a graphic on Canva (it’s a cheap, amazing graphic designer that is so easy to use) and then post it on Pinterest. So if your post is about “tips for a cross country drive“), make a cool Canva graphic about that and add the text, “tips for a cross country drive” and a link to your post and then post it to Pinterest and you will start getting Pinterest users directed to your posts. Don’t underestimate Pinterest for lifestyle blogging. if you follow these steps, the majority of your traffic will come from Pinterest at the beginning.

Don’t try and start a YouTube channel and a new blog at the same time. You only have enough time to make one of these things big. As I discuss below, Youtube will come a few years later once you start scaling up.
A lot of people make mistakes by following the “shiny new thing mindset“. They start a blog, and then they see something cool some other blogger (who has been doing this a lot longer) is doing like a course or an e-book or a YouTube channel, and then they want to emulate that. Trust me, you cannot start a blog and any other side-hustle at the same time. Your blog needs a lot of attention. Also, it must be said that if this is your first blog, focus on just this one, don’t try and start three different niche sites at once. You. Will. Run. Out. Of. Time. And. Burn. Out.
Just focus on pumping out blog posts (for now).
Step 12. Keywords
Major Key Alert: Conduct keyword research.
At the beginning, and for two years even, you simply won’t have the juice to make it to the front page of Google for big keywords. The chance of you hitting the front page for words like “best diapers” or “best hotel in Chicago” is zero. This is true even if you have the best post of all time. Google does not value you yet.
However, you can make it to Google’s front page if you write about “longtail” keywords where there is little competition. For example, you could write a blog post on “Amazing Indian food in south LA” and you could have a chance to rank with that.
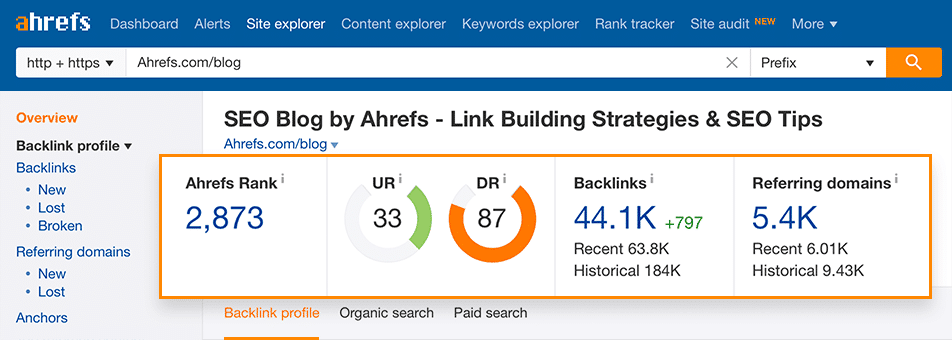
To see if you have a chance to rank a post on google, you must use Ahrefs. They find the “low-hanging fruit” among your keyword ideas. So if you type in “best toys” they will spit back a bunch of longtail keywords you should write about instead where you have a real chance to rank.
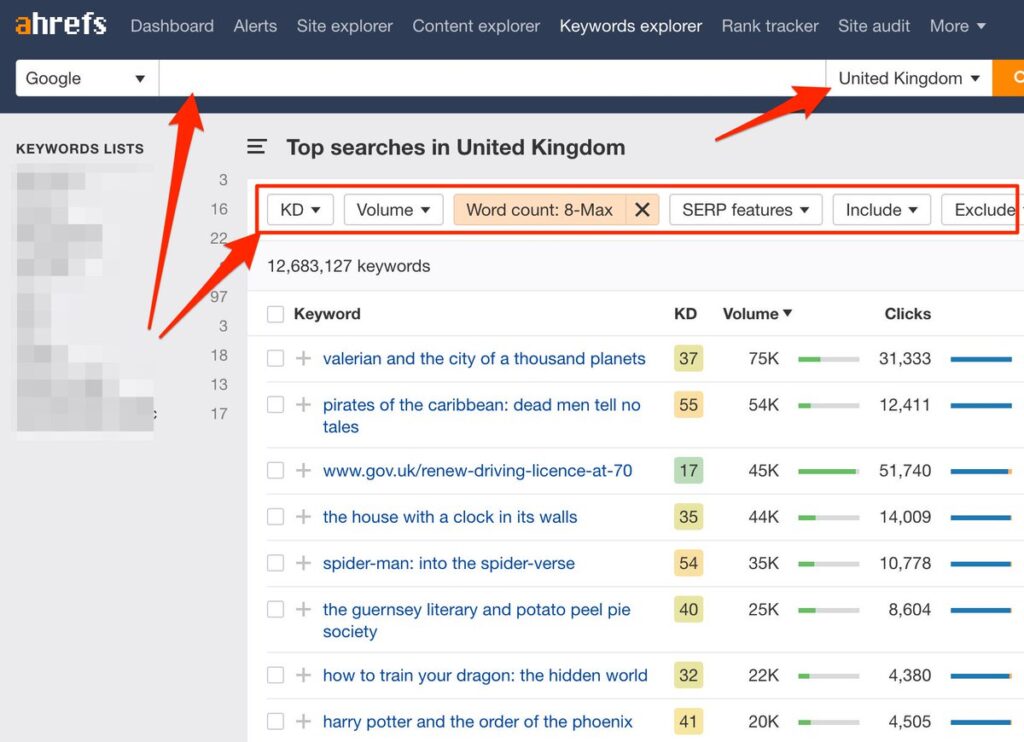
Also, don’t write about keywords that don’t get googled. To get traffic, you need to write about something people are actually googling. Ahrefs has a keyword estimator so show how many times a keyword or phrase is googled per month.
If this is your personal blog, and you want to write about whatever makes you happy, then do that. But if you want traffic, you have to write for Google.
One more thing: Don’t write affiliate-link style posts just yet (i.e. best-of lists). Write information articles first. You won’t be getting much traffic to your posts for a minute, so there is no point in making best-of lists yet. Write “how-to” articles instead. These are easier, look less spammy, and drive backlinks better.
Lastly, as a new blogger, try and write about evergreen content. If you write about “the best stocking stuffers for kids”, you will only get traffic one month a year. Instead about “the comfiest socks for hiking”.
Ahrefs has a whole suite of other SEO tools included in the price, and it’s a must-have (I will talk about his further down below). If you are serious about blogging, Ahrefs is the single most important tool. I wholeheartedly recommend it. I am not trying to make an affiliate, I am trying to convince you that you must get it!
Step 13. Post
Write the very best post on the internet on your keyword. Always take care that the internet you are using is reliable and that its speed is good so it can fulfil your requirements. Spectrum is one of the providers which is good choice if you are still looking for an appropriate one.
To get started, just press the “New Post” button in WordPress to get started. You will be taken to WordPress’s post editor, which is sort of like Microsoft Word.
I recommend all posts should be 1000 words or more (but less than 2500 so you don’t burn out). Google prefers longer posts than shorter ones.
Use SEO hacks to format your posts:
- Use H2 headings.
- Add one or two pictures with alt text inside.
- Add an outbound link to a cool article explaining something (like this).
- Add an inbound link to another one of your posts (you can add this later if this is your first post).
- Make sure all your posts have an author box at the end of the post (your theme probably has one included or you can download an author box plugin). This helps for SEO and looks cool too.
Near the end of the post, use the Yoest plugin in the WordPress editor (its located at the bottom) to see if you draft post passes the SEO test. Yoest will check SEO things like whether or not you added the keyword phrase to your post enough times, among others.

Next, run your draft post through Grammarly to make sure that it has no errors and is easy to read. Google hates bad spelling and grammar.
Save your draft and come back to your post the next day to finalize it. Fresh eyes really help catch the last few mistakes.
Step 14. Links
Focus on offsite SEO. The Google algorithm cares about the content of your post, but they also care about the website as a whole too. This is why webpages like Forbes can post about anything including “best diapers” and still rank very highly just the same as some finance keyword. They have Google juice.
You don’t have any Google juice yet so you can’t compete. But you could one day if your website builds enough authority.
The first thing you need to do for offsite SEO is to build “backlinks”. Backlinks are when other websites link to yours. The more backlinks you have, the more Google juice you have. Get backlinks from friends, blog directories, or by offering to guest blog on other blogs. Monitor your backlinks with Ahrefs. You want to get a 100 backlinks by the first year and 2500 by the fifth year. Eventually, you will collect backlinks organically because somebody writing a post will inevitably link to one of yours. For example, I am going to link to this page about backlinks because I think it’s so great.
The next thing you need to do is ensure your website is up to speed. Google devalues slow websites. Use Google Insights to check your page speed and try and fix what they recommend you fix. You can do this yourself or hire a developer on Upwork.
Noted SEO blogger Neil Patel discusses offsite SEO in this handy blogpost.
Step 15. Content
Blog consistently. Content is king. As I mentioned above, don’t waste your time editing your homepage. Spend all your time making new posts.
A lot of people ask, “how long does it take to get 1000 visitors per month?” But, the answer always depends on the speed of new posts creation. If a blogger posts one post per month, the blog could perhaps never hit 1000 visitors per month, but if a blogger makes ten new posts in the first month, it could only take two weeks to get 1000 visitors per month!
If you want to hit 50,000 visitors so you can approved for Mediavine ads, you better have about 100 posts with high quality content and good keyword research (i.e. picking the right keywords to blog about).
I got to 150,000 visitors per month with about 140 posts in a very small niche.
Thus, if you keep posting, you will keep growing. My advice, which I do on all my websites, is to post one new post per week. You will have growth every month that way. Before you know it, you will have 75 or so posts and you may be getting 5,000 visitors per day!
Hot Tip: Don’t burn yourself out by posting everyday.
Step 16. Metrics
Take a step back. Blogging is NOT a get rich scheme. It is going to take at least a year or two until you start seeing consistent traffic.
Don’t get bummed out that your posts aren’t getting any attention at first. Don’t expect to sell any affiliate products or make money with ads for a while. Don’t even put up affiliate links or ads until your website takes off. For one, you will be booted off these programs because you’re not making any sales, and second, you will scare away your traffic.
Google is going to place you in the sandbox for the first year, testing you. But one day, in a year (or two) in my experience, you will wake up in the morning and see your traffic increased by 1000%. It’s sort of magic. You can speed this process up, slightly, with a good backlink strategy.
If you blog consistently on easy-to-rank, high+ search volume keywords, and slowly build backlinks, and ensure your website is friendly, the traffic will come. I promise.
In your first six months, you will probably only get 50 visitors per month.
In month 7 you will get 100 visitors per month.
In month 8 you will get 200 visitors per month.
In month 9 you will get 400 visitors per month.
In month 10 you will get 500 visitors per month.
But by the end of two years, you will get 50,000 visitors per month. The next year you will get 150,000 per month.
This is exactly what happened with me.
Don’t quit when you feel dejected. And you will feel dejected for a year at least. Just remember that it takes new blogs a long time to rank well on Google. This happens to everyone. There is nothing broken about your website. This is standard. Keep pumping out content.
Try and focus on Pinterest in the short term. They will send you traffic even if your website is brand new.
Step 17. Funnels
Focus on categories and sales funnels. You want to eventually have enough posts whereby you can make submenu items for certain categories. For instance, if you review all the best “blogging tools”, you would make a subheading leading to a portfolio page of all “the best blogging tools”. Note, however, you cant make this cool thing yet until you get enough posts to fill it out.

Try and choose 5 categories for your blog like my blog does: (Mine is Family, Indoors, Just For Fun, Outdoors, Travel). I do not recommend you make too many categories as Google doesn’t like that too much. If you become a bigger authority in a few years, you can make more categories.
Step 18. Spice
Make your homepage look nice. After you have about 100 posts, its time to focus on the looks of your site. By now you will have some experience with your theme editor or Elementor, so it should be easy to do it yourself. Or you could commit a few thousand dollars to a developer on Upwork to do it for you.
Step 20. Monetize
After your site is getting about 20,000 users per month, you should consider joining an affiliate partnership. Amazon is great because it converts so well. But you can make more money with other programs on Awin and CJ Affiliates, for instance.
After 50,000 users per month, join Mediavine, which will serve ads on your websites for you. Mediavine pays way more than Google Adsense. Mediavine is the most recommended ad manager in the blogosphere.
Step 21. Outsource
Outsource. Now that your blog is a success, its time to scale up. You can’t carry this on alone. My recommendation is to find good bloggers for hire to write for you (good articles are about $100-250 USD). Experiment with “pay per article” writers on Upwork until you find a good fit. Yes, there will be some bad writers, but with a little time, you will find a good one.
With more writers in your arsenal, it’s time to start posting twice daily. In no time will you have 1000 articles, which by any reasonable estimate will mean 1,000,000 visitors per month!
In addition, at this point, it’s time to make an e-book and a course and to broaden your affiliate network. Start that YouTube channel too. You will have a staff of editors, graphic designers and writers doing all the heavy lifting.
With any luck, you could make a million dollars a month from your blog.
If you want to learn more, Income School has a whole course that really expands on this post, showing how to earn a living from blogging, step by step, in 24 months. The Income School YouTube channel is amazing if you don’t want to join a course though.
Good luck!
Your Post is very well and I am very impress on your website keep again same posting. >>>>>>>>>
Civil Engineering Jobs In Canada
Normally I don’t read article on blogs, however I wish to say that this write-up very compelled me to try and do it! Your ԝriting taste has been surprise >>>>
jobs jobs in dubai